
|
Tired of your teen's bathroom being disorganized, cluttered, and impractical? Check out this video to watch the bathroom transformation we did for this teen. We decluttered + organized her bathroom and added some modern updates. Now, her bathroom is functional and stylish! "Sage Organizing Co.'s services are amazing and Candi is an organizing wizard. Candi was so easy to work with and so much was accomplished in just a couple of days. The list is endless! I ABSOLUTELY recommend them!" -Kim T. Home Organizing Client Need some more help getting your bathroom organized? Click here to learn more about our home organizing services. Related Articles: 5 Pantry Organizing Mistakes to AVOID 6 Ways to Organize with Baskets 5 Easy Summer Organizing Projects Professional Disclaimer: The ideas, recommendations, and opinions on this website, blog, and made in person are for educational and entertainment purposes only, and should not be considered legal, financial, or medical advice. I am not an attorney, doctor, or licensed financial professional. Sage Organizing Co., LLC is not liable for any losses or damages related to actions or failure to act related to the content of this website, blog, or in-person discussions. If you need specific legal, financial, or medical advice, consult a professional in your area
0 Comments
Normal People with Average Closets, Unite!
|

|
Two Tips.
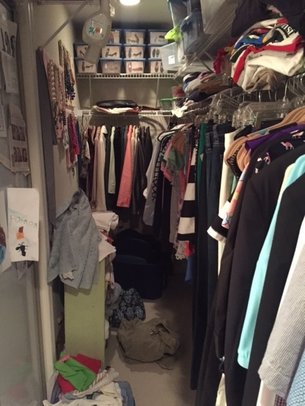
1: Always keep donation bags in your closet. If you have to go searching for a grocery bag to bag up your stuff, you’ll lose the momentum and quit. Just stash some extra bags in the closet and fill them as needed. Trust me, it works. 2: Take your full donation bags to your car immediately. If you leave it sitting on your closet floor, it’s never leaving. Go throw it in the back of your car and drop it by Goodwill (or wherever) the next time you’re out running errands. |
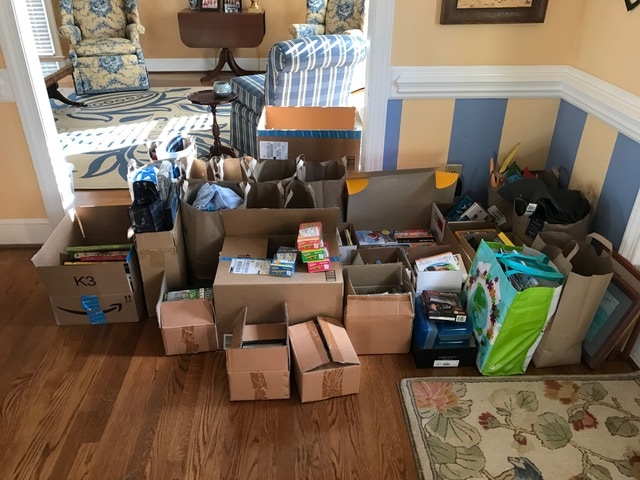
Boxed & Headed to goodwill
|
Commandment two: Arrange what is left over
 Joan Crawford Agrees No Wire Hangers
They are an eyesore, but they also don’t support your garments well. In time, they will bend and bow and ruin the lines of your garment. Ladies, you have nice things, so treat them well. I don't care if it is a Target t-shirt: treat your clothes nicely!
 All new Slimline hangers
Have all your hangers match.
This eliminates the visual clutter in your closet. If you can afford it, slowly invest in and build up a supply of the velvet lined slimline hangers. (Better Homes and Gardens makes a box set of 30 that you can purchase at Walmart). Slimline hangers allow you to hang more garments in the same amount of space. I also love that garments don't slip off the hanger.
 Used existing plastic hangers
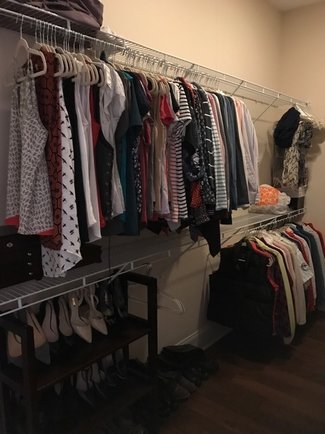
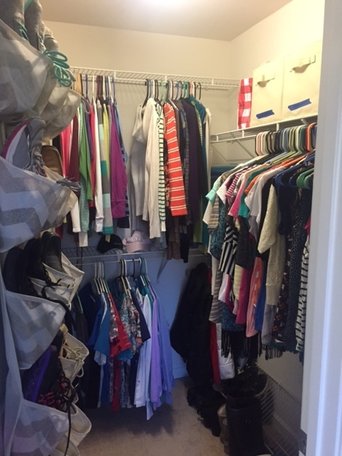
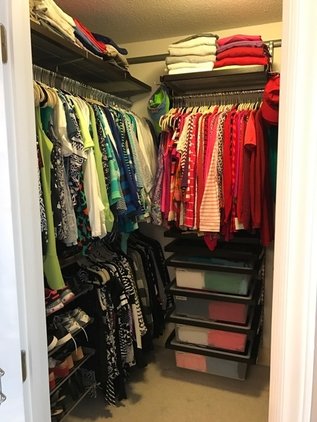
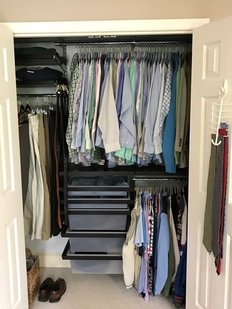
My closet cleared out & extra shelving added
|
Use dead space in your closet. Most average closets I’ve seen have the hang bar, then one shelf above it. But truly, there is usually room for a second shelf above that. If you can add another row of shelving, you’ve just doubled the number of items you can store. Get yourself to Home Depot, buy more shelving, and put in another row. You’ll end up using that top shelf for your lesser used items.
Use the floor to your advantage too. Tuck your laundry baskets underneath your short hang items. |
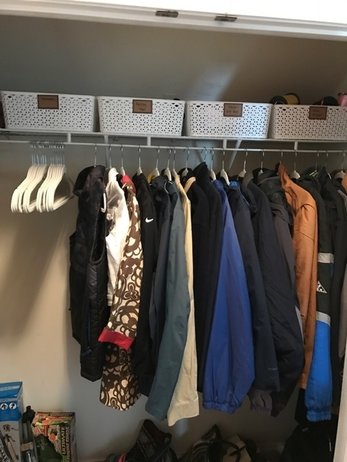 all jackets stored together
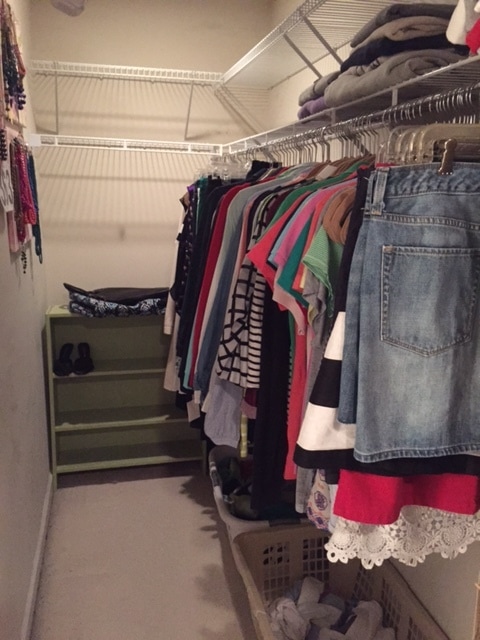
 work clothes stored in easily accessible part of closet
If you work 40 hours a week, put your nice work clothes up front. If you seldom dress up, put your casual things closest to the door. I personally like to put the trendy seasonal items at the front of my closet, and the classic pieces further back. However you dress is the way you should organize your closet.
Stand Back, Admire Your Progress
Let's move on to the third Commandment of Closet Organization.
The Third Commandment: Maintain it, yo.
Follow the One In, One Out rule. It’s easy. If you buy one new shirt, you must get rid of one old shirt. Two new dresses? Gotta donate 2 old dresses, pal. If you can make yourself follow this rule, your closet will never again get out of control. PREACH~!
Need to thin out your items quicker? Try a One In, TWO Out ratio.
Want to be even a little more hardcore? Don’t keep extra hangers around. That way you can’t “cheat” the One In, One Out rule because there aren’t extra hangers. It’s brutal, but I’m here to tell you, it works.
Wilt thou follow the 3 commandments of closet Organization?
Let's hear your questions in the comments section! Do you think the 3 Commandments will work for you?!?
Related posts:
How I Created a Sunday Routine That Works for Our Family
Clutter Puts the "Rage" in Garage:

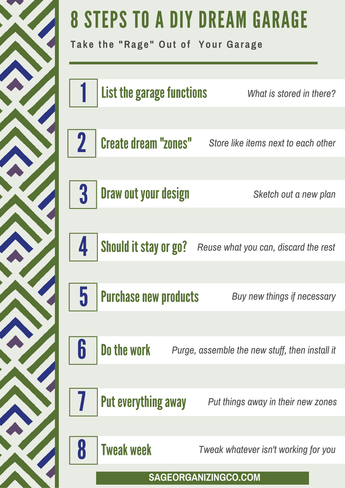
Includes free steps to DIY your dream garage planner
Over the years, garages have the tendency to go through an ugly metamorphosis:they begin as nice tidy spaces that easily hold two cars and then suddenly one day they are total unusable disaster zones. It happens to the best of us! But it doesn't have to be that way.
When my husband and I decided that we were tired of the clutter taking over our garage, we decided to DIY: we cleaned out the Garage of Shame and turned it into a gorgeous Garage Drop Zone. After learning the tricks to successful garage DIY organization transformation, I started helping clients do the same. In this post, I'll share all the details to help you do the same.
|
As a bonus, I'm giving ya'll this awesome DIY Your Dream Garage Planner. Click here to access it.
|

Want To learn more about diy garage organization? Read on...
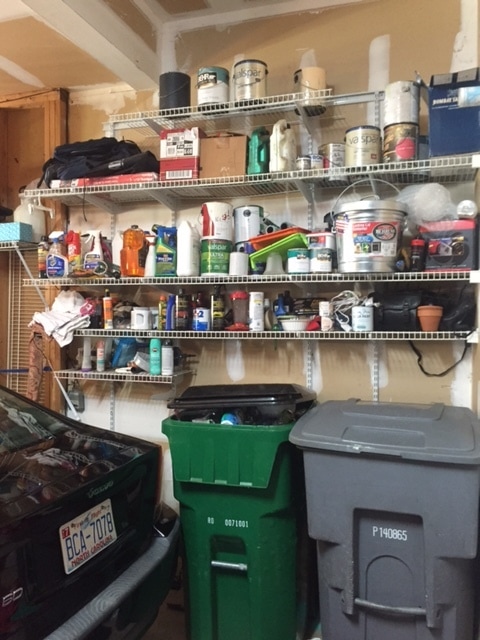
clutter puts the "rage" in garage
You know what I'm talking about, don't you? Cars that doesn’t run. Enough kid sports equipment to start a minor league team. All the stuff you bought at Costco that doesn't fit into the kitchen. And for the Love of All That is Holy: Shoes. Shoes, Shoes, Shoes.
I get it: most people don't have mudrooms inside, so all the shoes, backpacks, jackets, wet towels etc. ended up all over the kitchen floor near back door. The garage also has to hold all the tools, car stuff, gardening items, lawn equipment, etc. The real estate in the garage is valuable space and it gets ABUSED!


So Whatcha Gonna Do?
But it's not so easy. In my case, I ran into several problems.
- Problem #1 was, there was no room inside. We don’t have a home with a mudroom, and a remodel isn’t in the budget. If we were going to get the functionality of a mudroom, we’d have to DIY build it in the garage.
- Problem #2 was the budget. We decided on taking on this project in October. You know, that month that’s realllly close to Christmas. So our budget was next-to-nothing. This project had to get done on the cheap.
- Problem #3 was that we don’t have the skill set to build custom storage cabinets. We knew that whatever we couldn’t do ourselves, we’d have to pay someone else to do. Which put us right back at the budget problem.
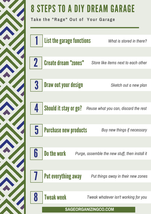
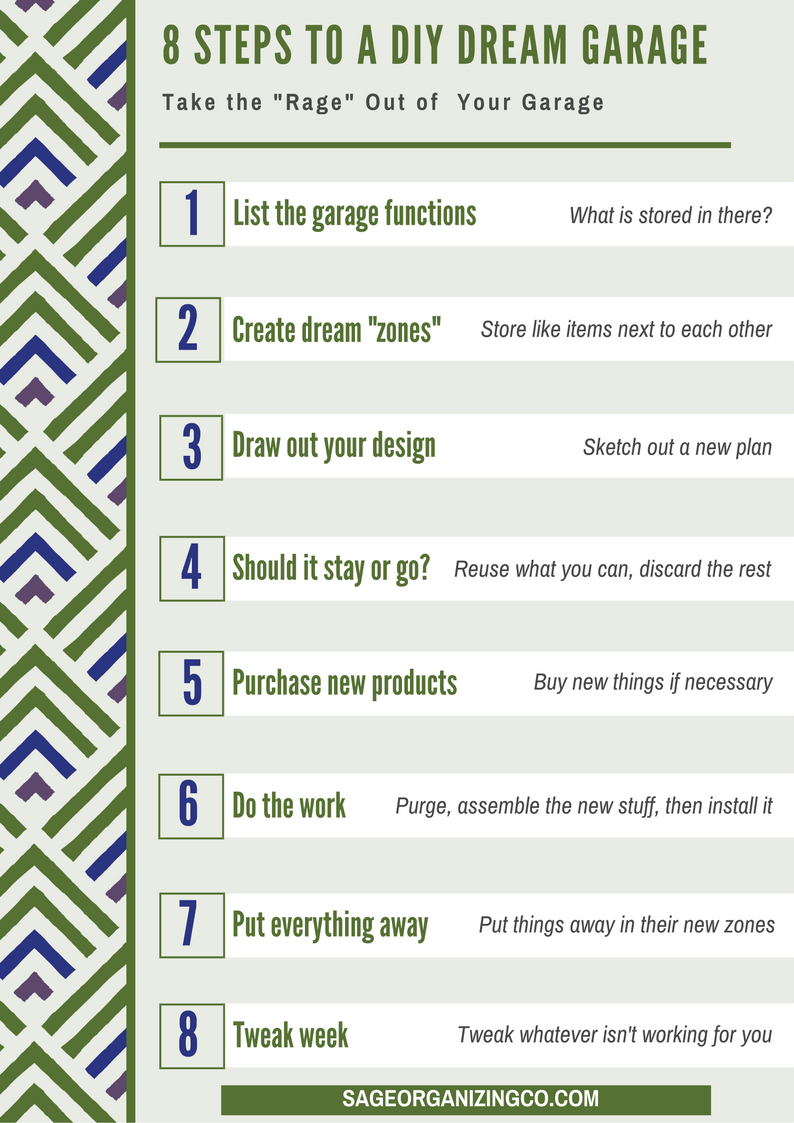
Step One: MAKE A PLAN OF ATTACK
Then to triple check, I researched DIY garage organization zones on Pinterest. I knew that I wanted to copy the “zone” concept that I read about. I also knew that I wanted it to be pretty, but not too feminine for a garage. But most of all, I wanted to make sure I had a home for everything.
What is your garage's j-o-b?
- Tools and Painting
- A box of miscellaneous wires and chargers that has been collected since college.
- Gardening and Lawn
- Old toys, car seats, etc. that have been outgrown
- Wedding gifts that the homeowner feels too gulity to throw away
- Cast off furniture that was deemed too nice to throw out
- Bikes, Scooters, Strollers and some sweet Green Machines
- Sports Equipment, both kids and parents
- Piles of shoes, boots, roller blades, and ice skates
- Sports Bar & Memorabilia (couches, tvs, serveware, memorabilia, beer refrigerator)
- Work storage, especially for people who work out of the home.
- Costco overstock, especially extra paper towels, beverages, and cleaning stuff
- Holiday and Birthday decor storage.
- Evidence of mice, spiders, birds, bugs, and once, a Copperhead snake. Yes: that was my house. Don't ask.
- Enough pop-up field chairs and/or beach chairs to seat a dozen people.
- Backpacks and Totes
- Closed storage for paper goods (to keep the bugs and mice away from the paper towels)
- Jackets, hats, mittens
- Pet stuff
Assess the Mess: How to Plan out Downsizing a Home
with free printable Room-by-Room checklist

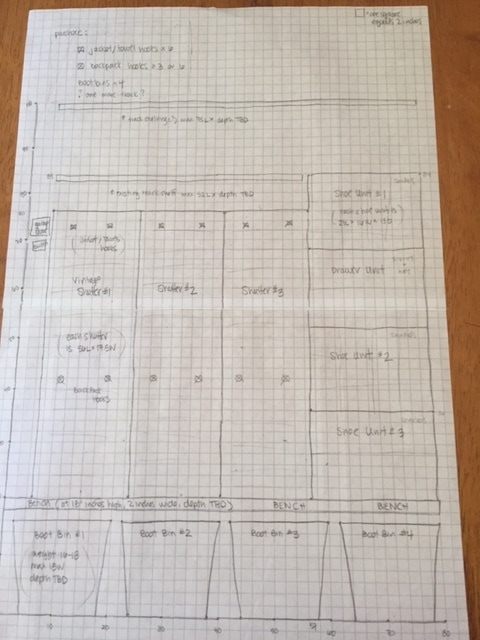
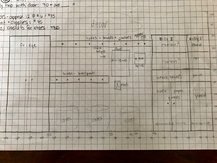
STEP TWO: DRAW OUT YOUR DESIGN. Or: I’m not an architect, but I did watch Mike Brady on the Brady Bunch.
|

|
Step three: should I stay or should I go?
What Hadda Go:
*The banged up metal shelving unit that came with the house had to go.
*The circa 1940’s desk that was warped and covered in 15 layers of paint had to go.
*And so did the pretty, but way too narrow-shelved bookcase I had from my days at the bookstore. It all went to the curb (and a guy in a truck took it before the City did).
What Was Getting a Second Chance
A bookcase with deep and adjustable shelves, that was painted an unfortunate shade of dusty blue sometime in the 90’s. I slapped on two coats of black paint to match the color of the new bookcases I was purchasing. (My goal was to have all the seperate pieces look like they were one cohesive wall unit).
What Needed to Be Purchased
Fixtures: 2 new bookcases with doors. I decided to go with Billy bookcases from Ikea, then added the doors on the bottom shelves. The price was right! I also wanted a bench and a row of heavy duty hooks. I couldn’t find a product I liked that would fit the function, so I found a local handyman who built a bench and row of hooks.
Décor: I love closed storage, so I was going to need baskets, bins, etc. I purchased those at Walmart (their Better Homes and Gardens product line has cute pieces at great prices). Naturally, I was going to need some new indoor outdoor rugs (Ikea), pretty wall décor and hooks (Hobby Lobby). All in, I think I spent about $500 on the new stuff, including the material and labor from the handyman.
Step four: put on your " diy /working in the garage" clothes
Step One: Binge and Purge. For about 2 weeks, we spent 30 minutes to 2 hours a day hauling the crap out of the garage. We filled our neighbor’s trashcans two weeks running. When we set things to the curb for the City to pick up, some random guy in a pickup hauled things off before the City got here. I filled the back of my truck and did a Goodwill run almost daily. Please hear me when I say: THROW OUT YOUR JUNK. IF YOU DON'T LOVE IT ENOUGH TO KEEP IT IN THE HOUSE, LET IT GO.
Step Two: Ikea Rage. Now that we had room to work inside the garage, it was time to paint existing fixtures to match. That was my DIY job, while my husband was in charge of Ikea-ing. I can’t repeat the language he used while building the bookcases, but you did notice the I said “Ikea rage”, right?!?
My handyman built the bench and row of hooks unit, then I painted and stained it.
Step Three: Install. When everything was ready, anchor everything to the walls, level it all out, installed hooks and, lastly, put up decor pieces.
Step Four: Stand back and say DAAAAA-YUUUUMM! Marvel at your brilliance. Crack open a cold beer.

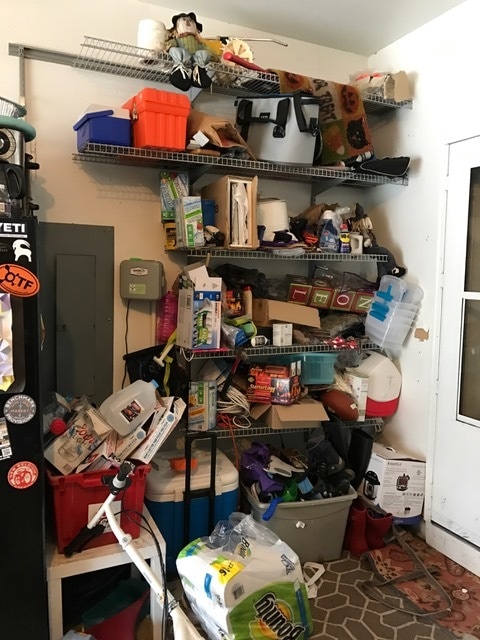
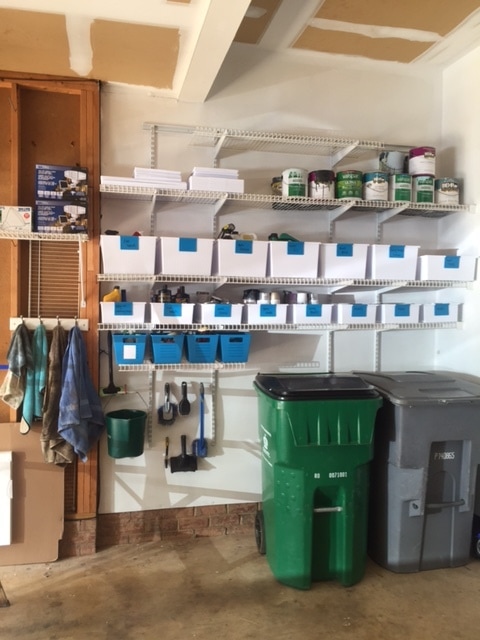
Before
|

after binge and purge
|
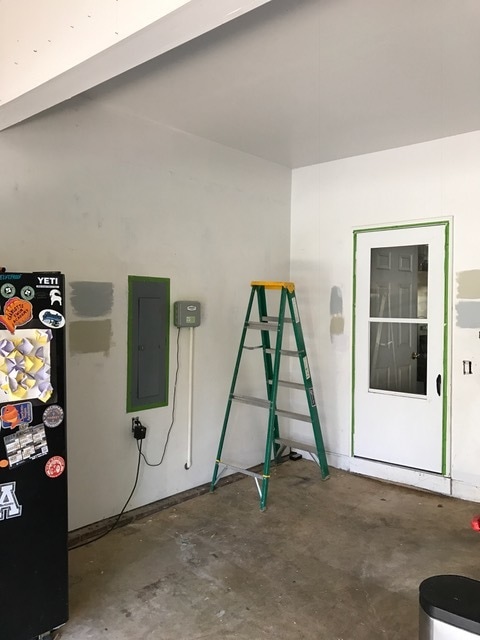
painting the area
|
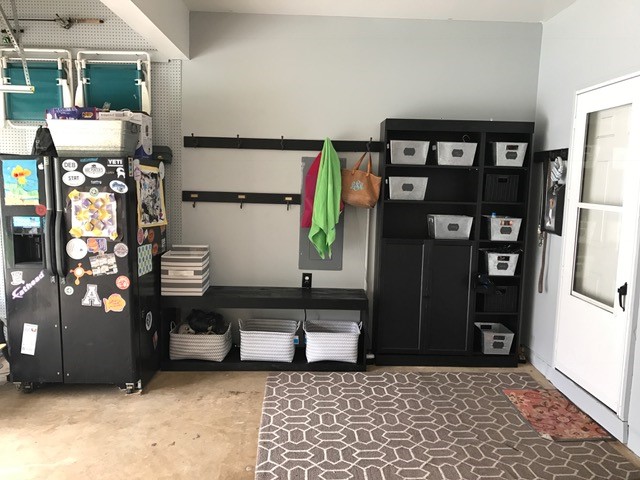
after
|
Step 5: pretend it December 26th. Put your stuff away!
I knew I wanted all the paper products to be behind the closed doors of the bookcases. Same for all the shoes. Having the beach towels out and easily reachable was important (our shorty is a year-round swimmer). We immediately started using the (well-anchored) hooks to hang backpacks and swim bags, tote bags, jackets and wet towels. We were able to move items that had been in hard to reach spots inside and put them outside in the unit.
Post-Holiday Organizing: Detox + Declutter Your Home After the Holidays
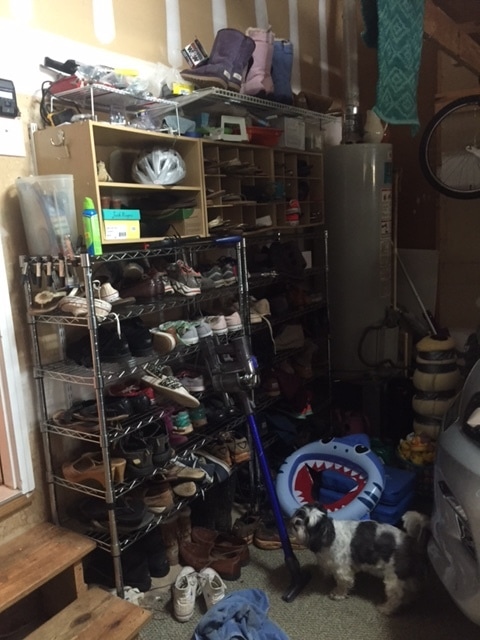
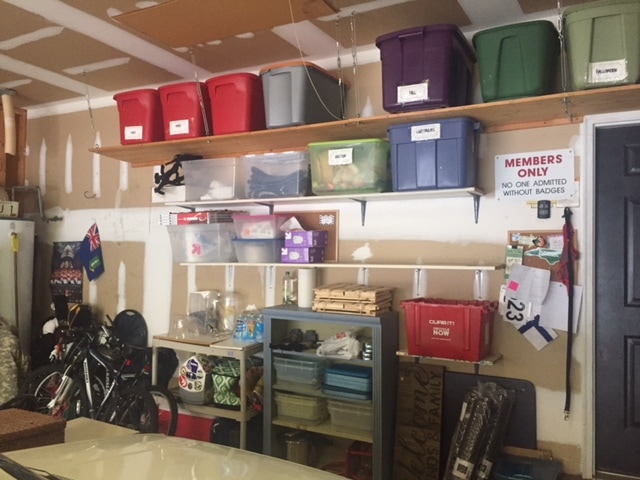
before

before
|
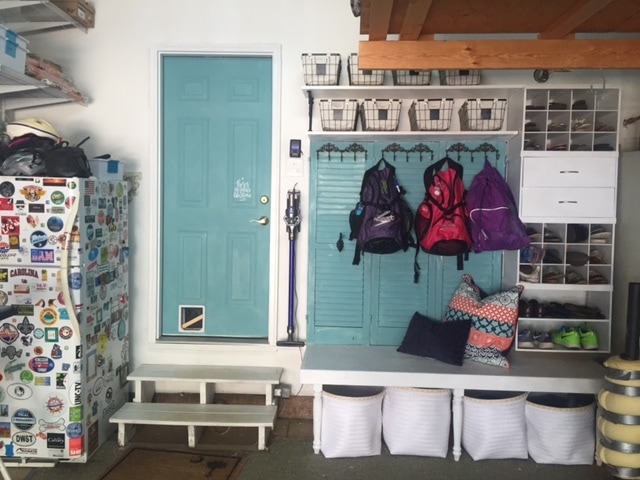
after
after
|
Step 6: Tweak Week
Results
Our favorite things? I personally love that all the shoes are put away into their closed bins every night. My shorty is happy that her swim towels actually get dry and don’t end up in a stinky pile. And the husband likes that his sports bar is now a source of pride, not shame.
before
|
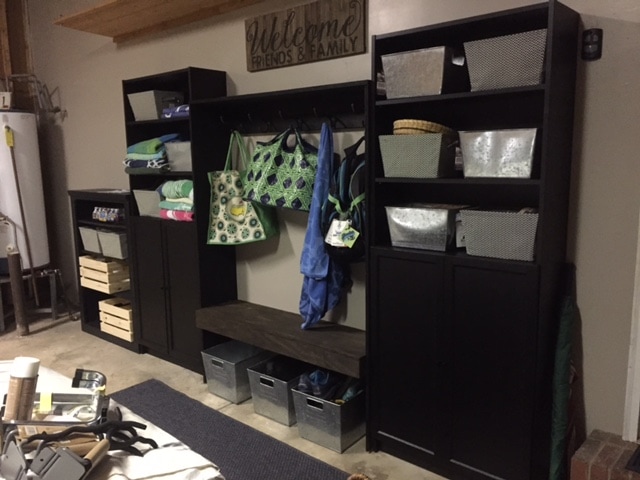
after
|
are you ready to diy your garage organization?
Let's hear your comments, questions, and success stories in the comments.
Professional Disclaimer: The ideas, recommendations, and opinions on this website, blog, and made in person are for educational and entertainment purposes only, and should not be considered legal, financial, or medical advice. I am not an attorney, doctor, or licensed financial professional. Sage Organizing Co., LLC is not liable for any losses or damages related to actions or failure to act related to the content of this website, blog, or in-person discussions. If you need specific legal, financial, or medical advice, consult a professional in your area.
|
Grab access to the free Planner and all the other free printable organizing resources here.
|
|

Categories
All
Back To Schoool
Before & After
Closet Organization Ideas + Hacks
Decluttering Your Home
Downsizing Your Home
Estate Clearing
Family Heirlooms
Family Schedule Logistics
Free Download
Garage DIY Organization
Garage Mudroom
Grocery Planning
Holiday Organizing
Home Organizing
Later Life Planning
Meal Planning
Mental Health
Moving
Organizing Aging Parents
Organizing Products
Selling Offline
Selling Your Stuff
Sentimental Items
Weekly Family Routine
Looking for something?
Archives
November 2023
October 2023
September 2023
April 2021
March 2021
February 2021
January 2021
December 2020
November 2020
October 2020
September 2020
August 2020
July 2020
June 2020
May 2020
April 2020
March 2020
February 2020
January 2020
December 2019
November 2019
October 2019
September 2019
May 2019
April 2019
March 2019
November 2018
October 2018
September 2018
July 2018
June 2018
May 2018
April 2018
March 2018
February 2018
January 2018
December 2017
November 2017
October 2017
September 2017
August 2017
June 2017
May 2017
April 2017
March 2017
